P3 Head Removal
Copyright © 2023 Dave Sousa. All Rights Reserved.
This article explains how to remove the head from a Multimorphic P3 cabinet equipped with an LCD monitor instead of a translite.
The monitor does not need to be removed as part of this procedure. All necessary connectors are accessible below it. If you need to remove the monitor for some reason, it is best to do that first (see the Appendix at the end of this guide).
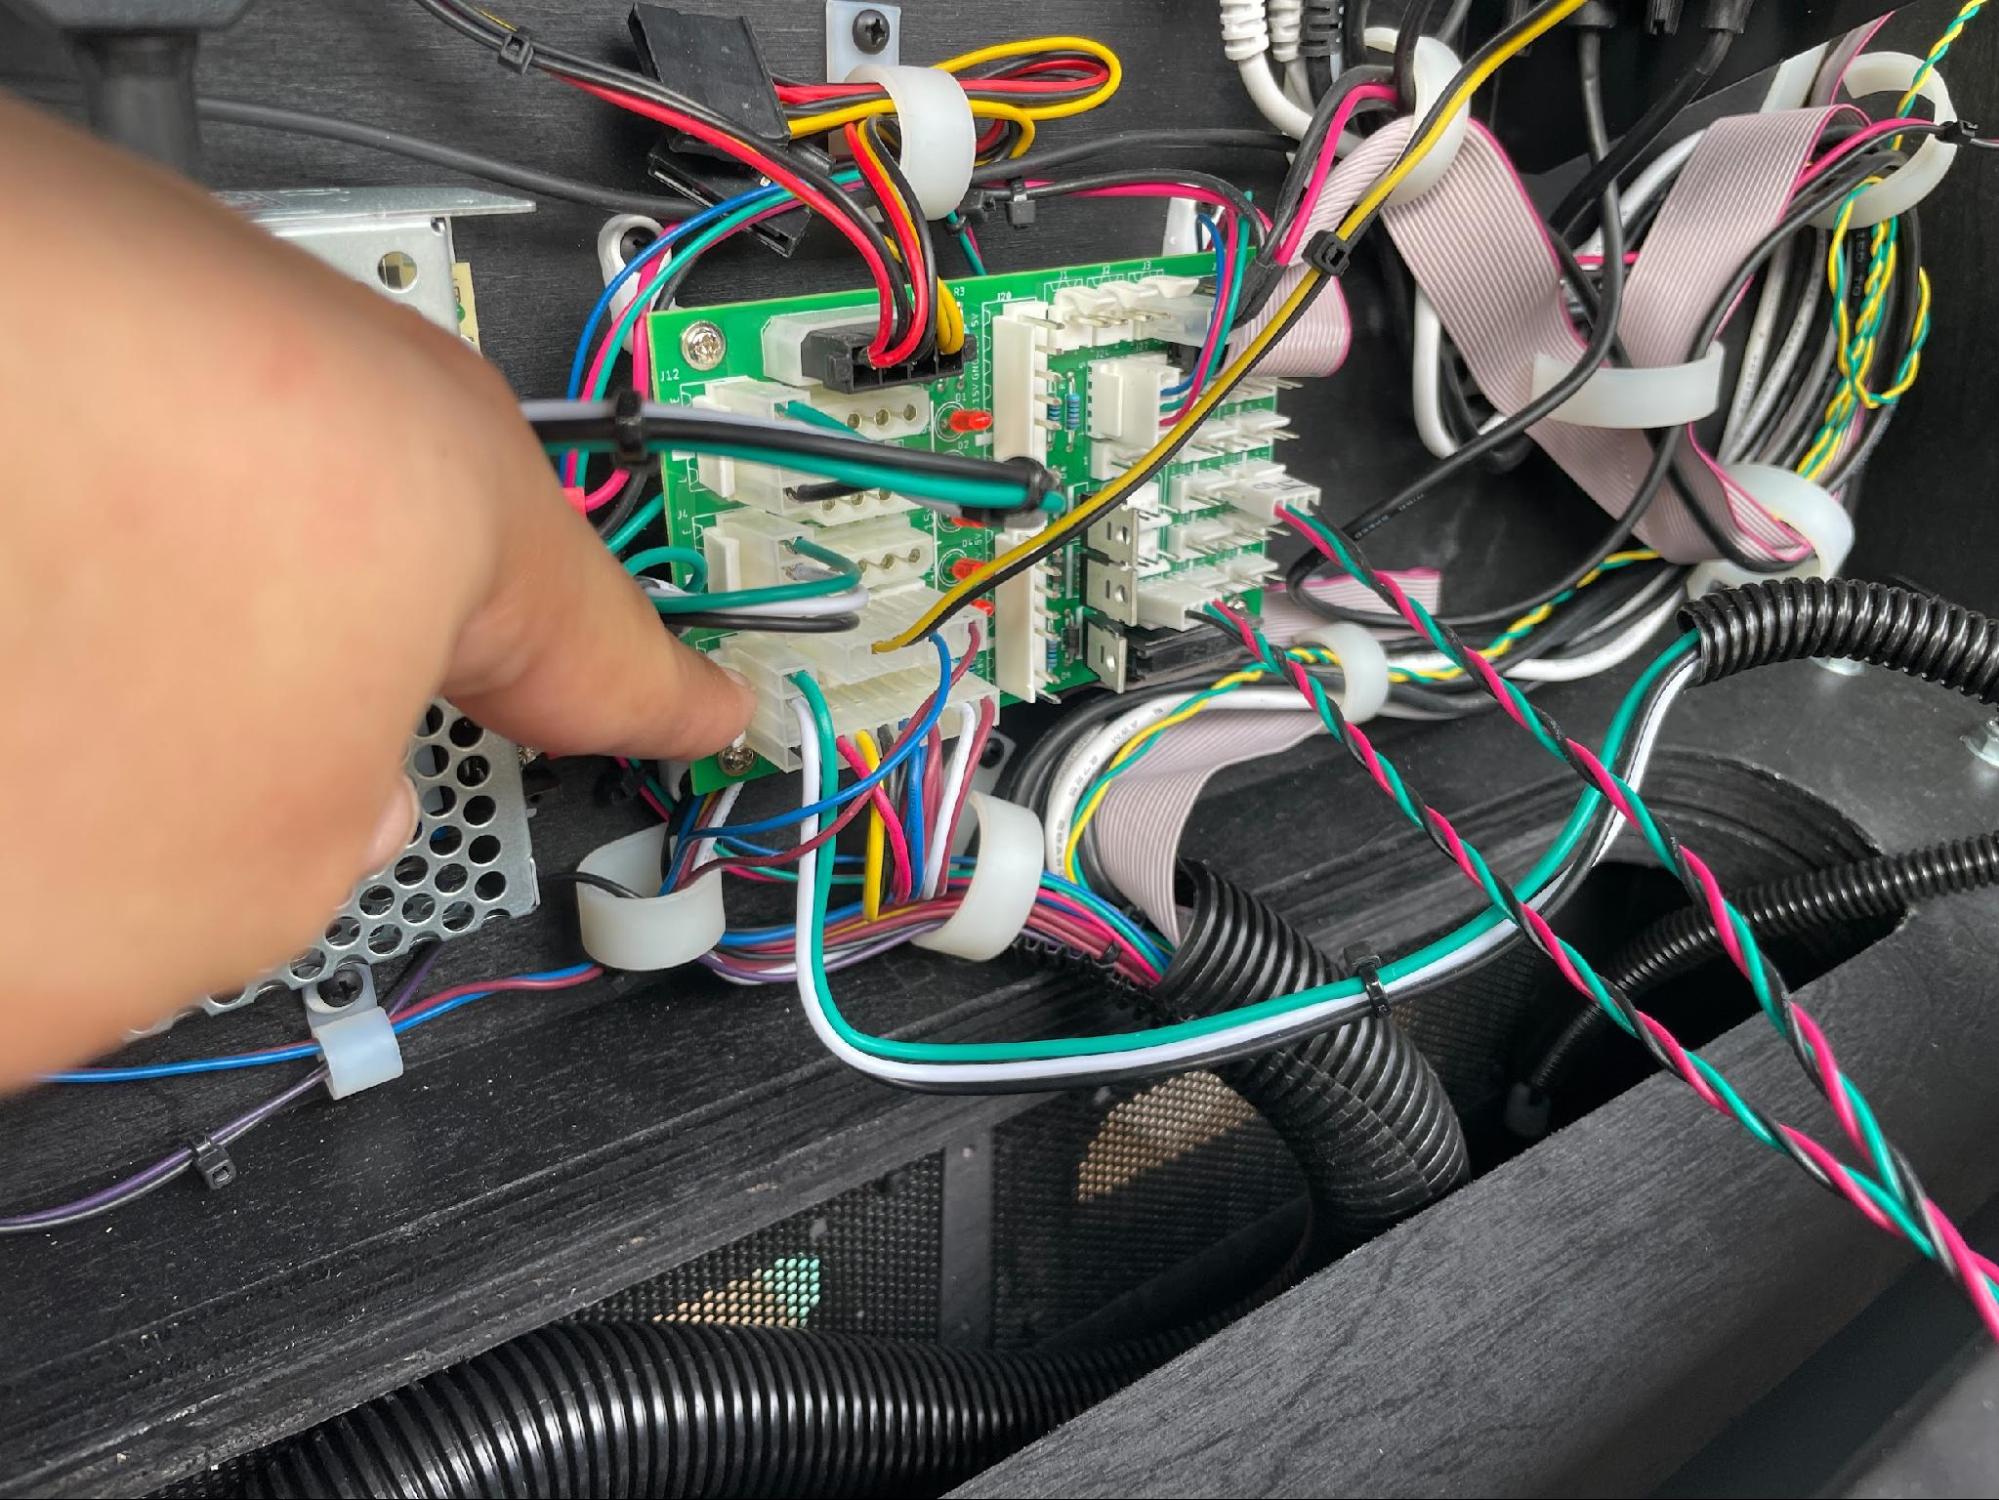
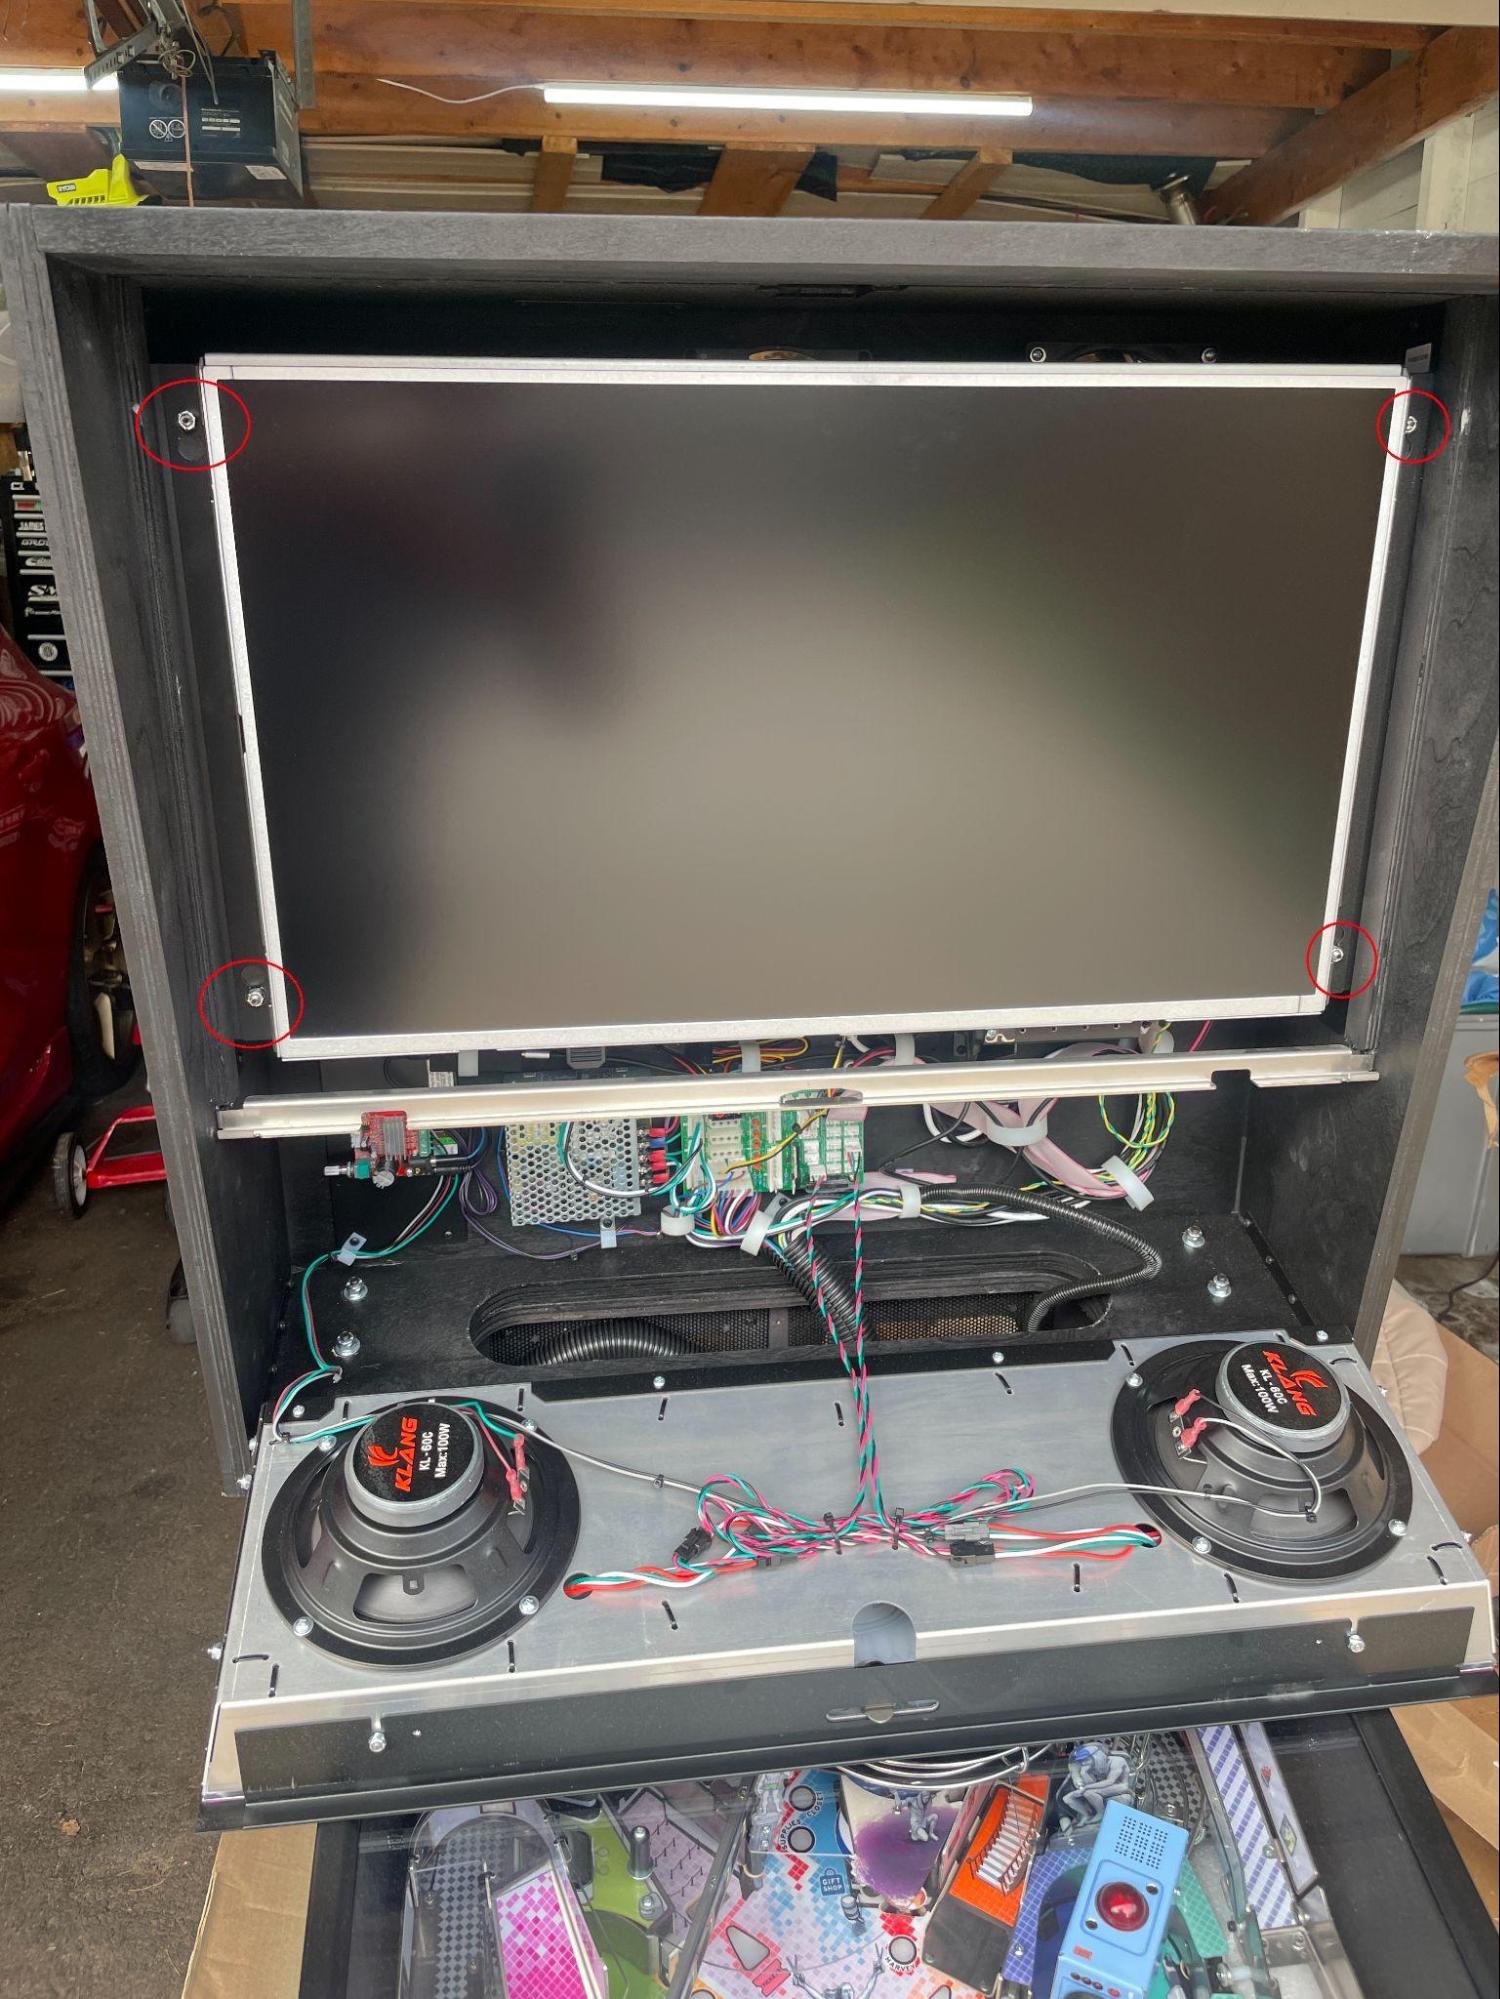
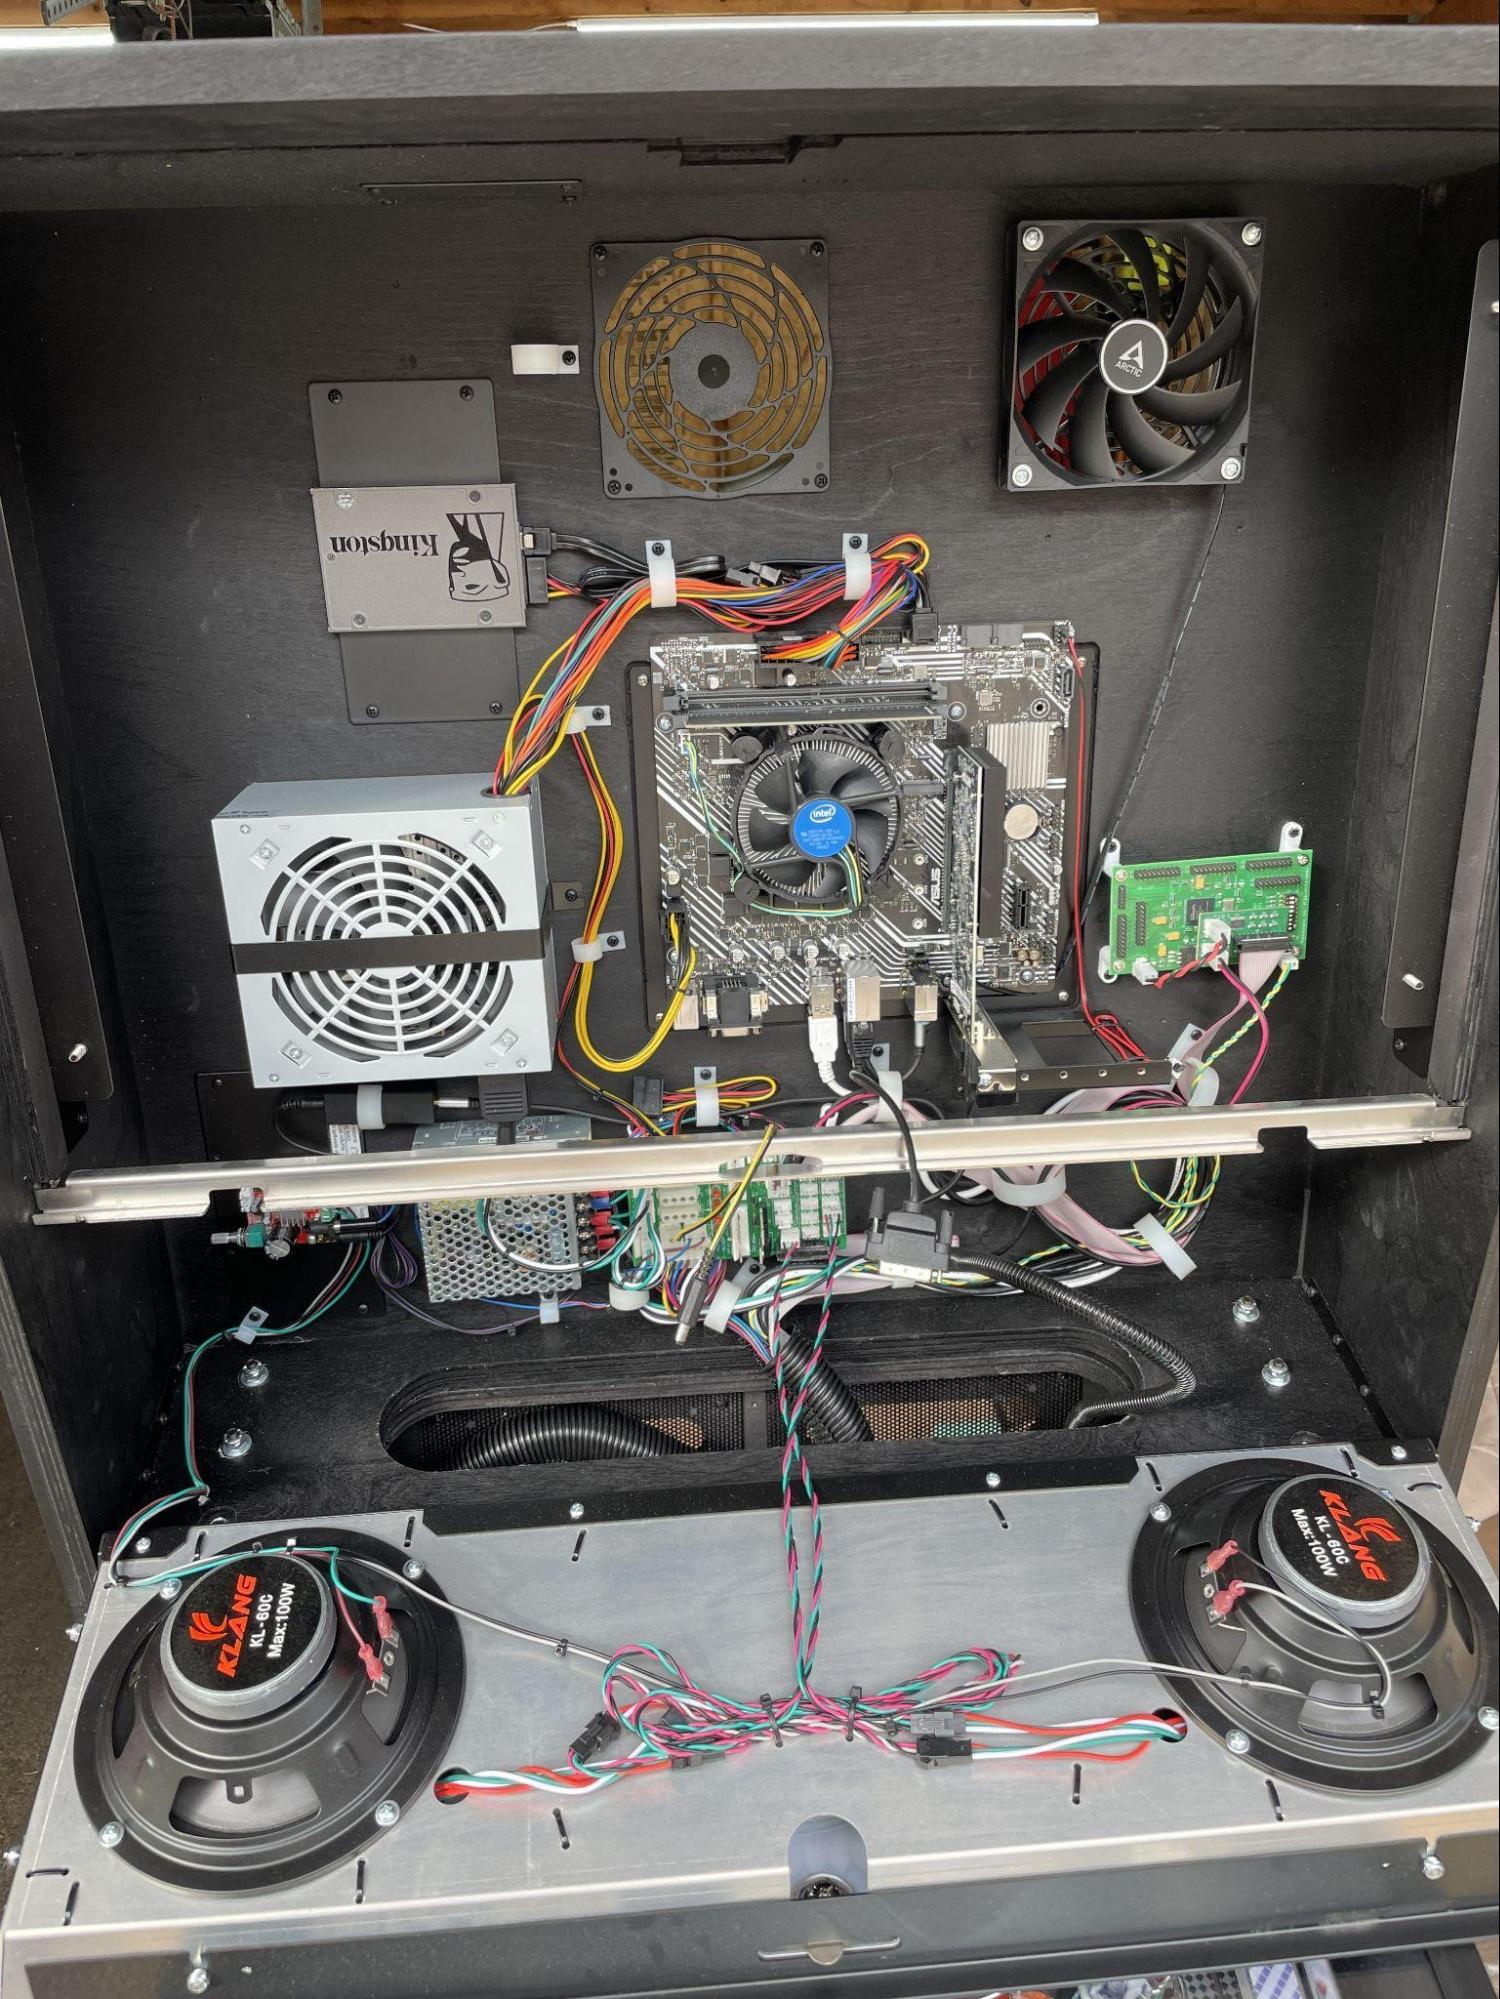
This picture shows the area behind the screen to get you oriented. We will proceed from left to right.
Step 0:
Before doing anything, make sure the machine is turned off.
Step 1:
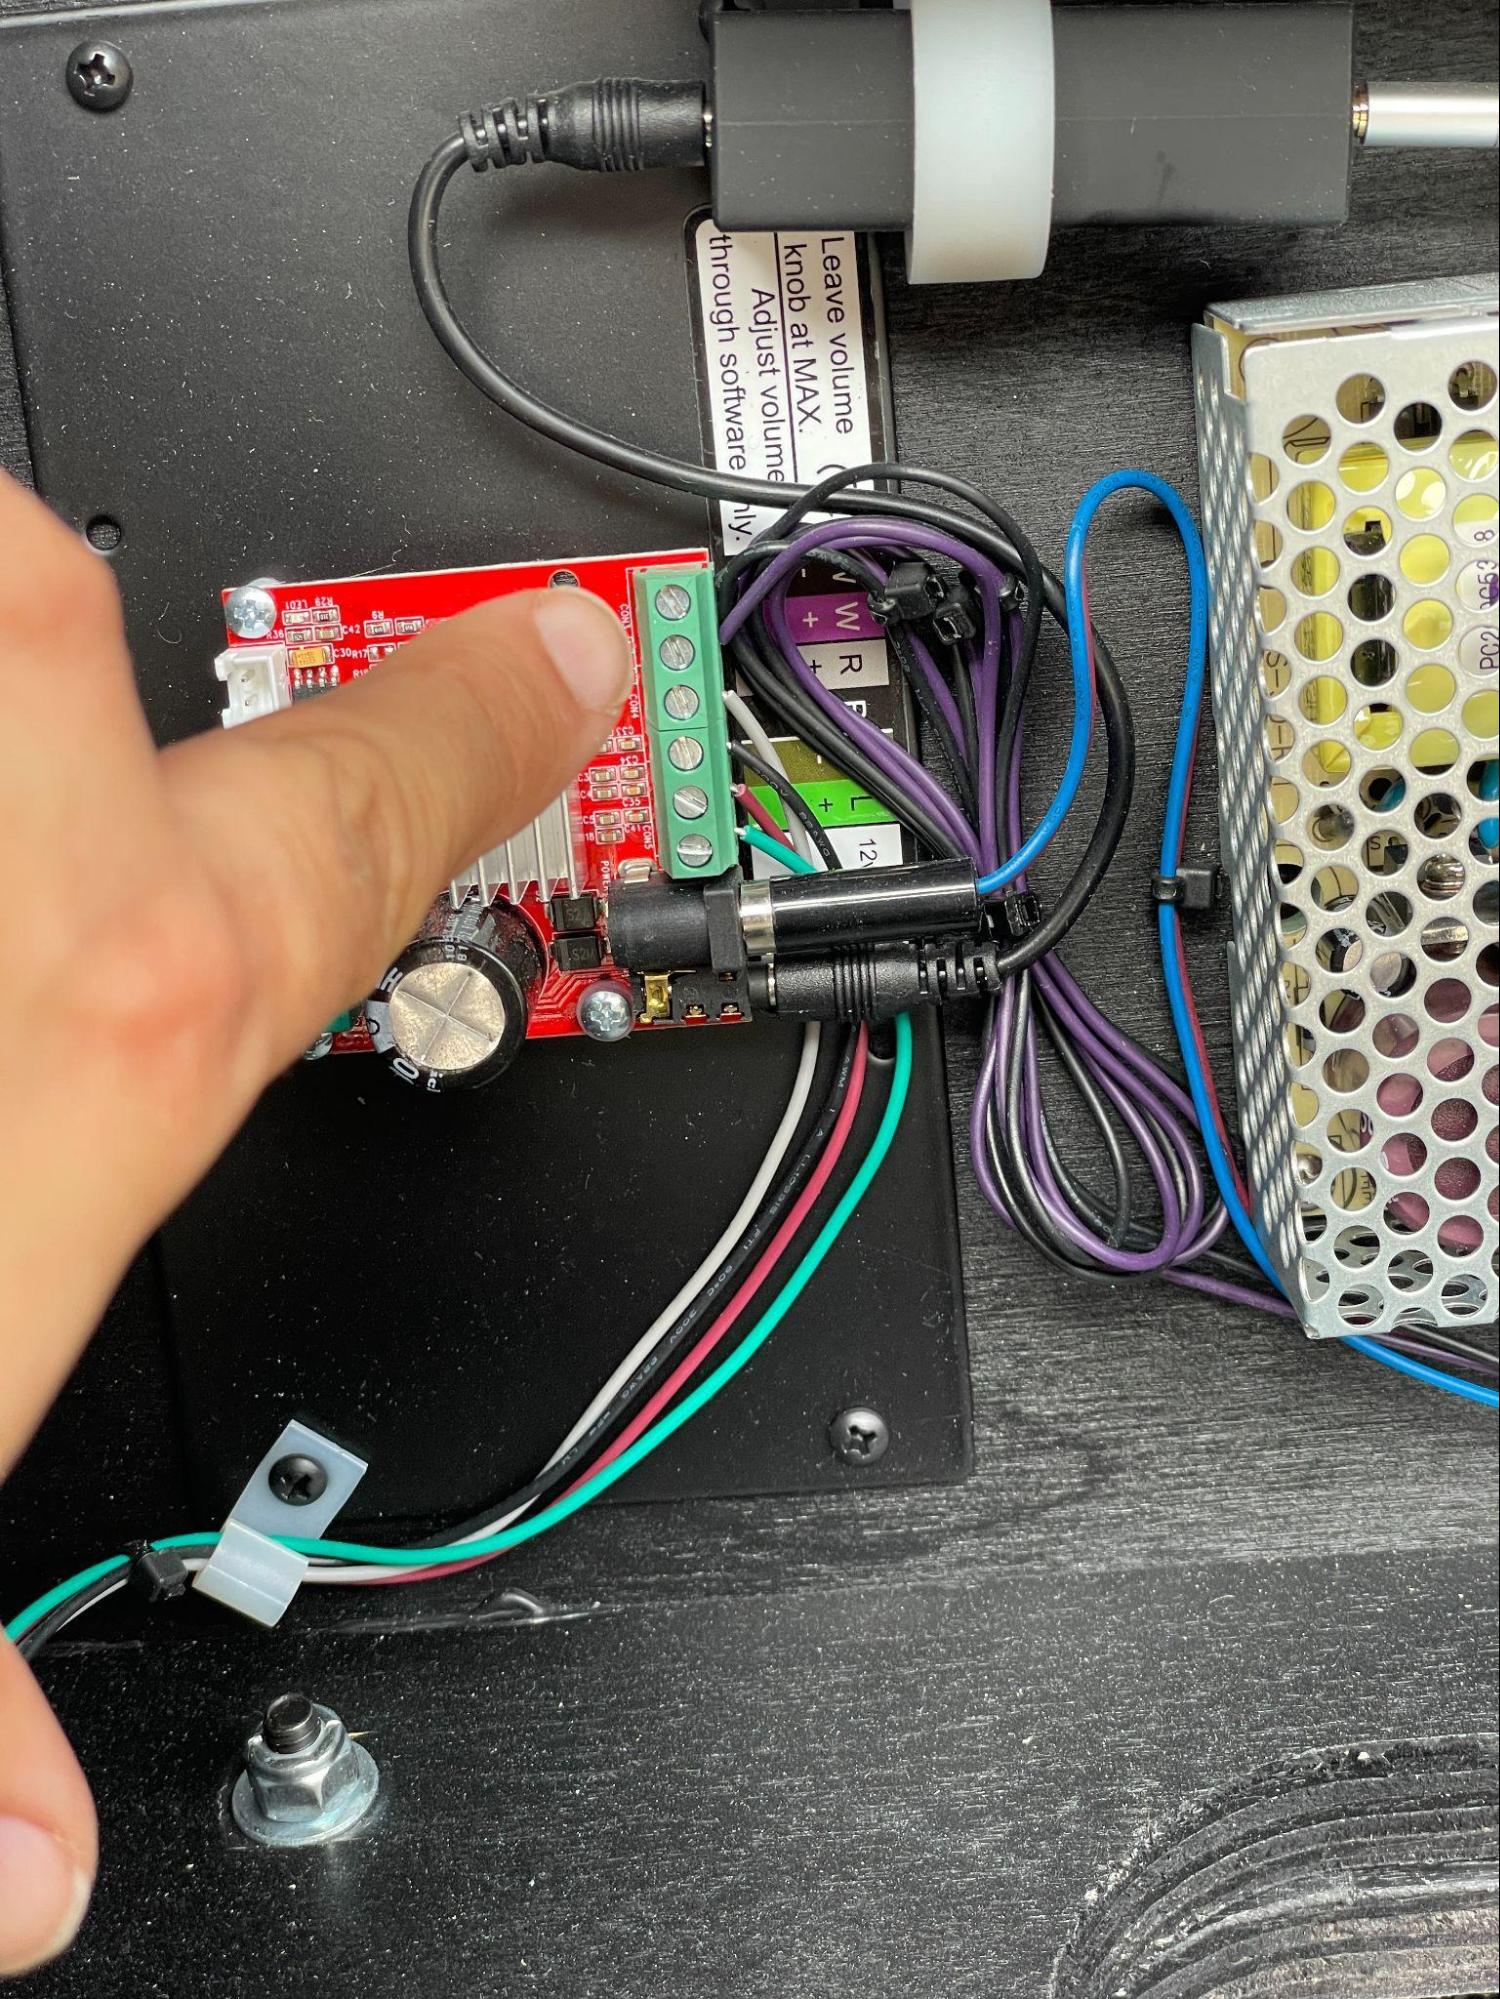
Disconnect the cabinet speaker from the amplifier on the left by removing the top black and purple cables going to W- and W+.
Step 2a:
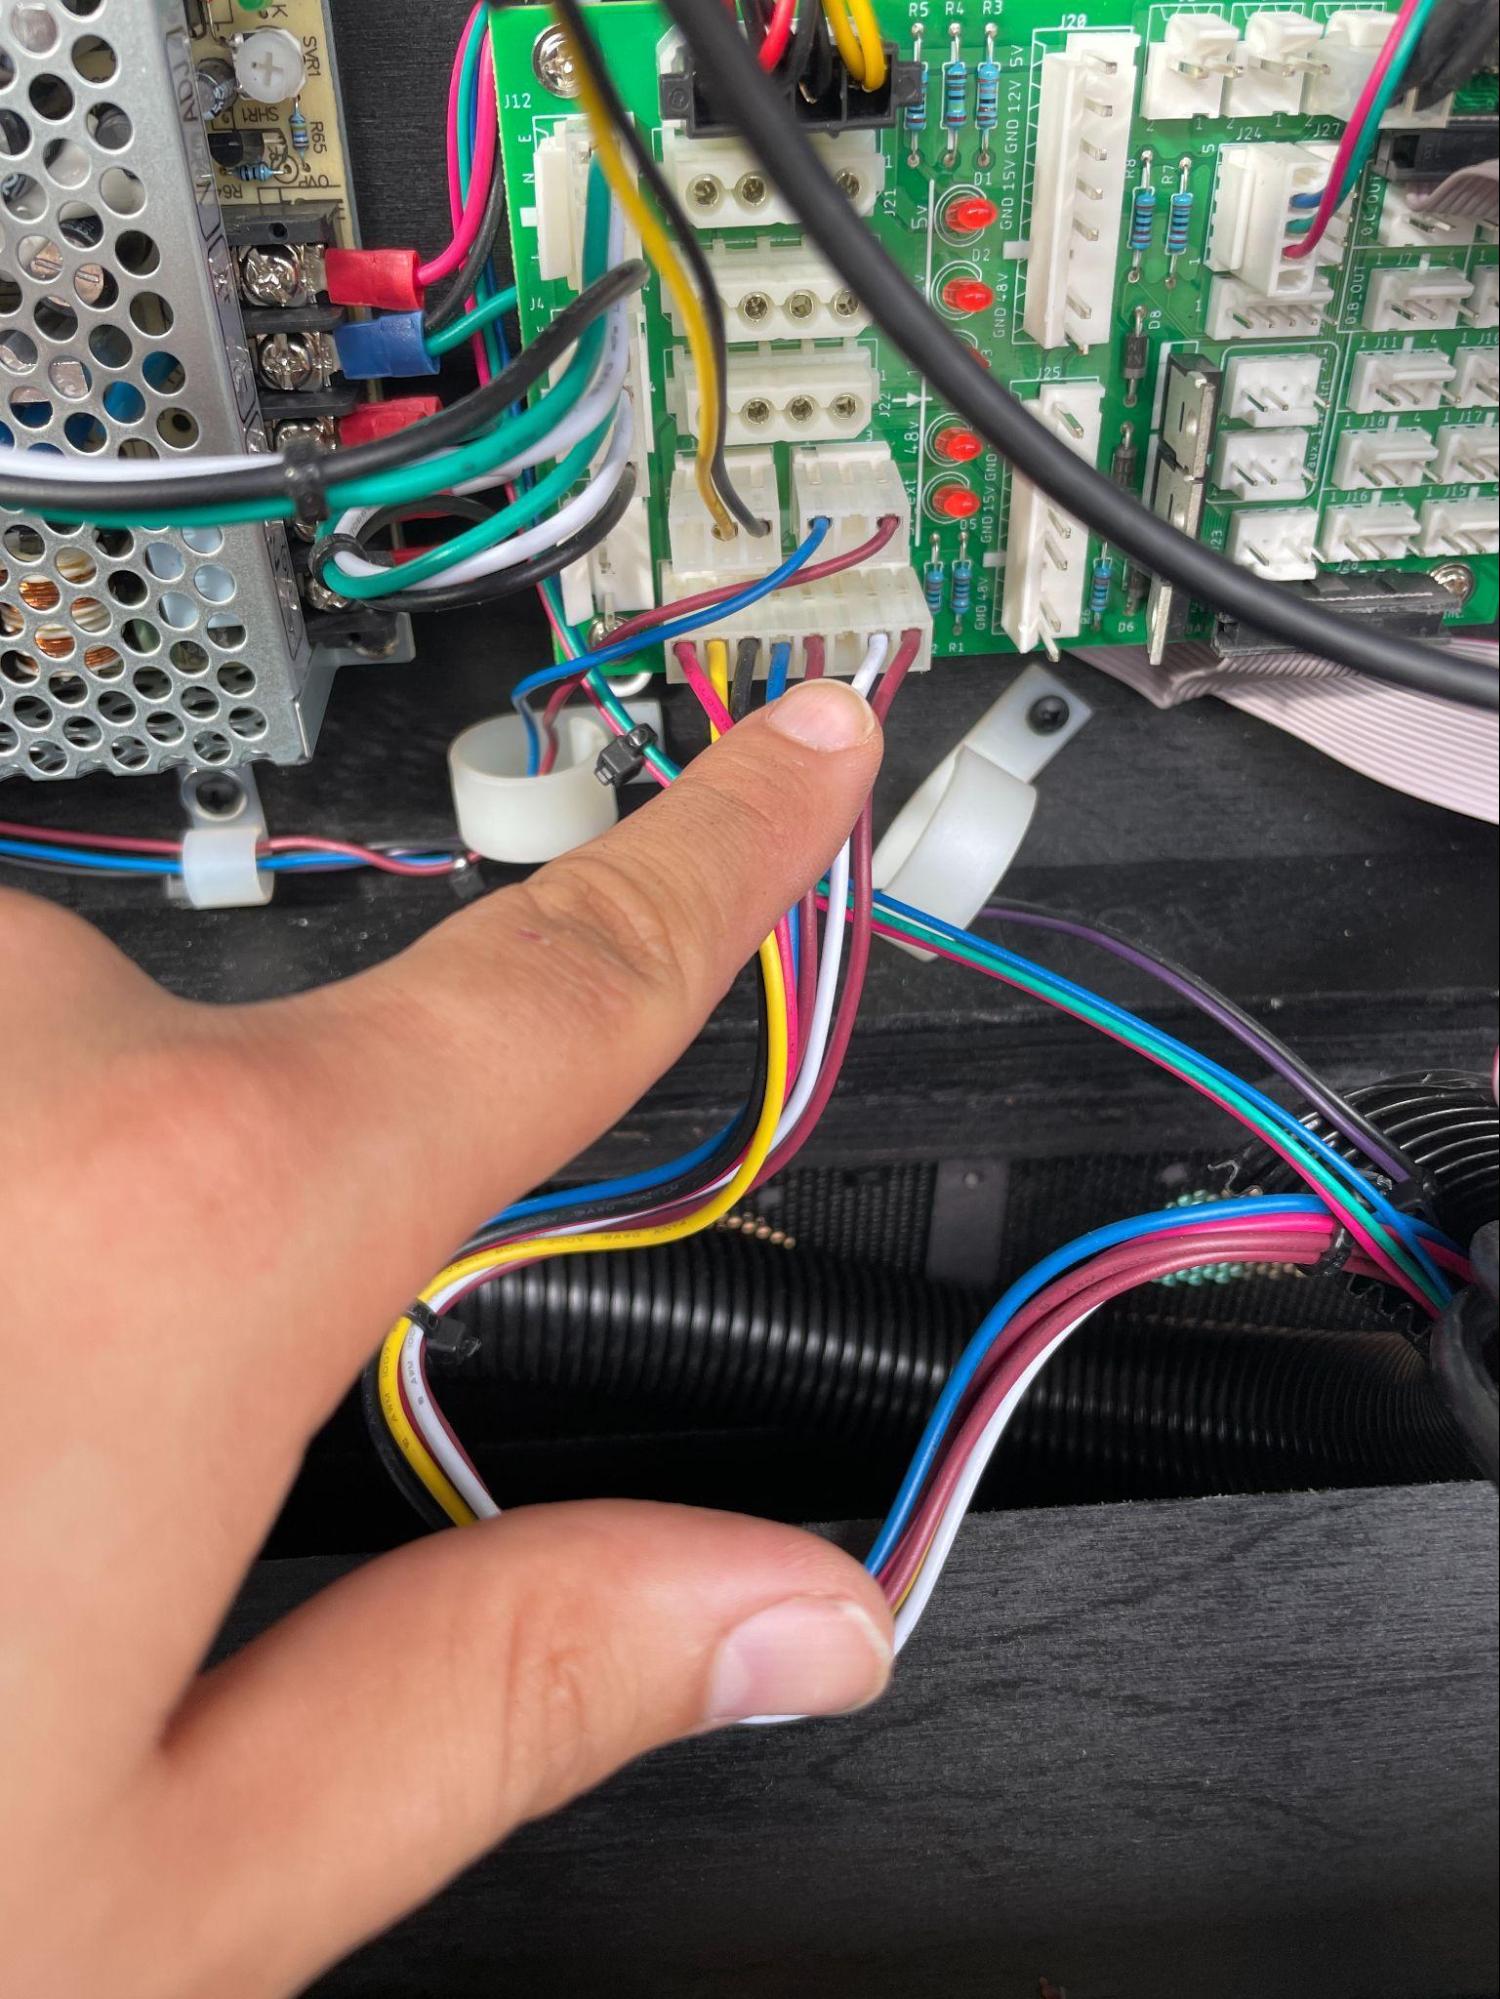
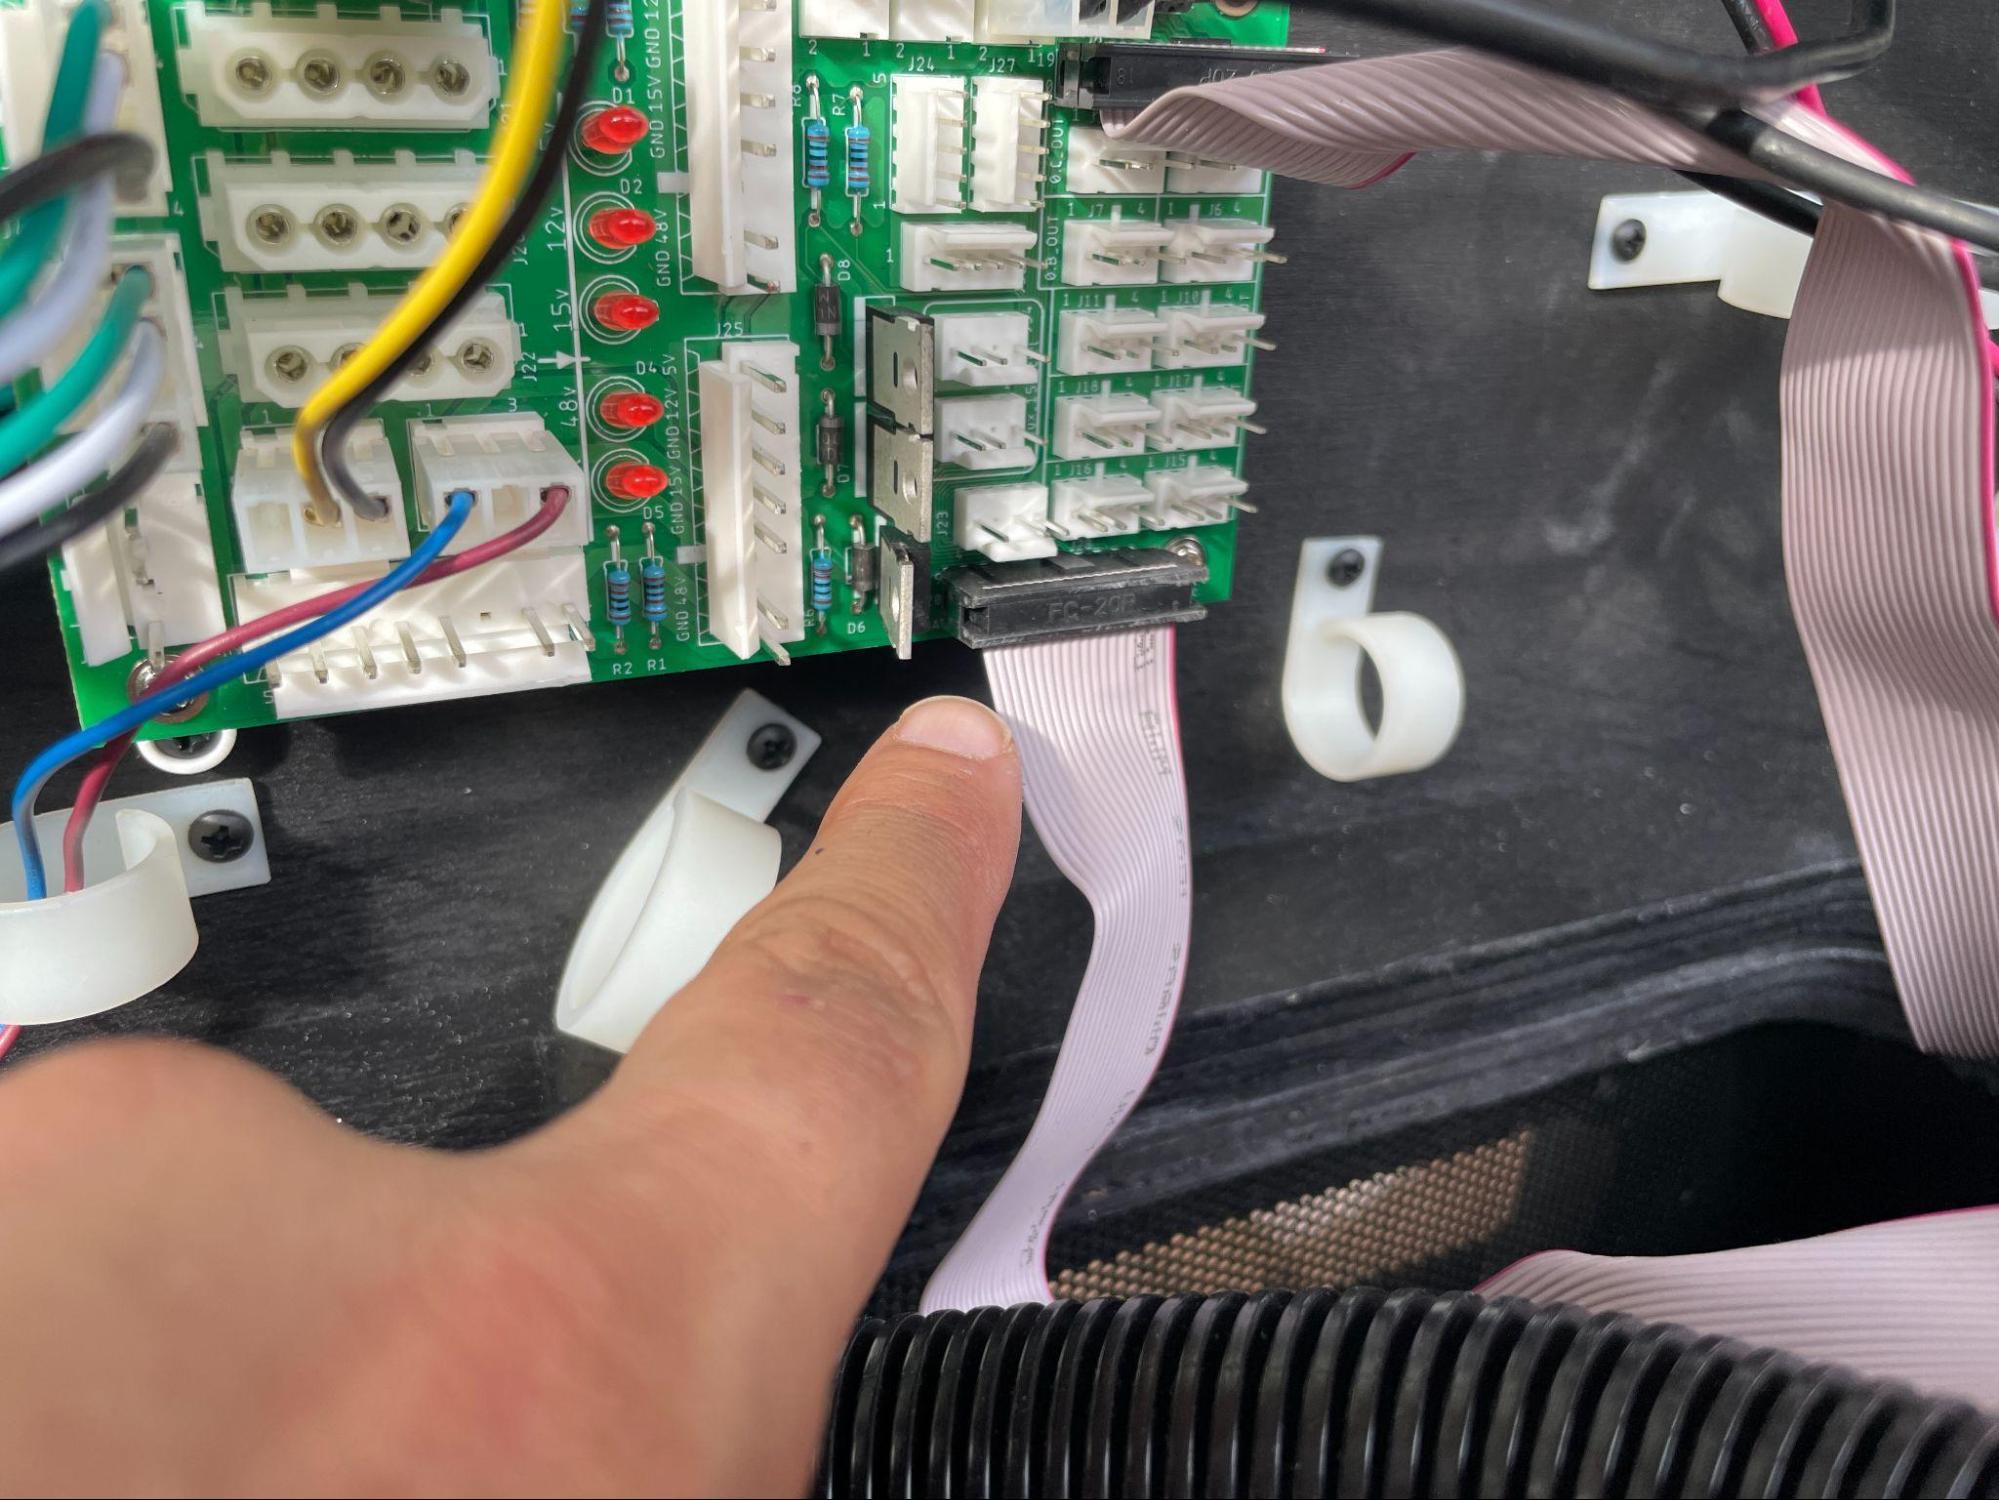
Remove the vertical J5 connector in the lower-left corner of the center breakout board. Push that single-wire loom out of the way.
Step 2b:
Remove the horizontal J31 connector in the lower-left corner of the breakout board.
Step 2c:
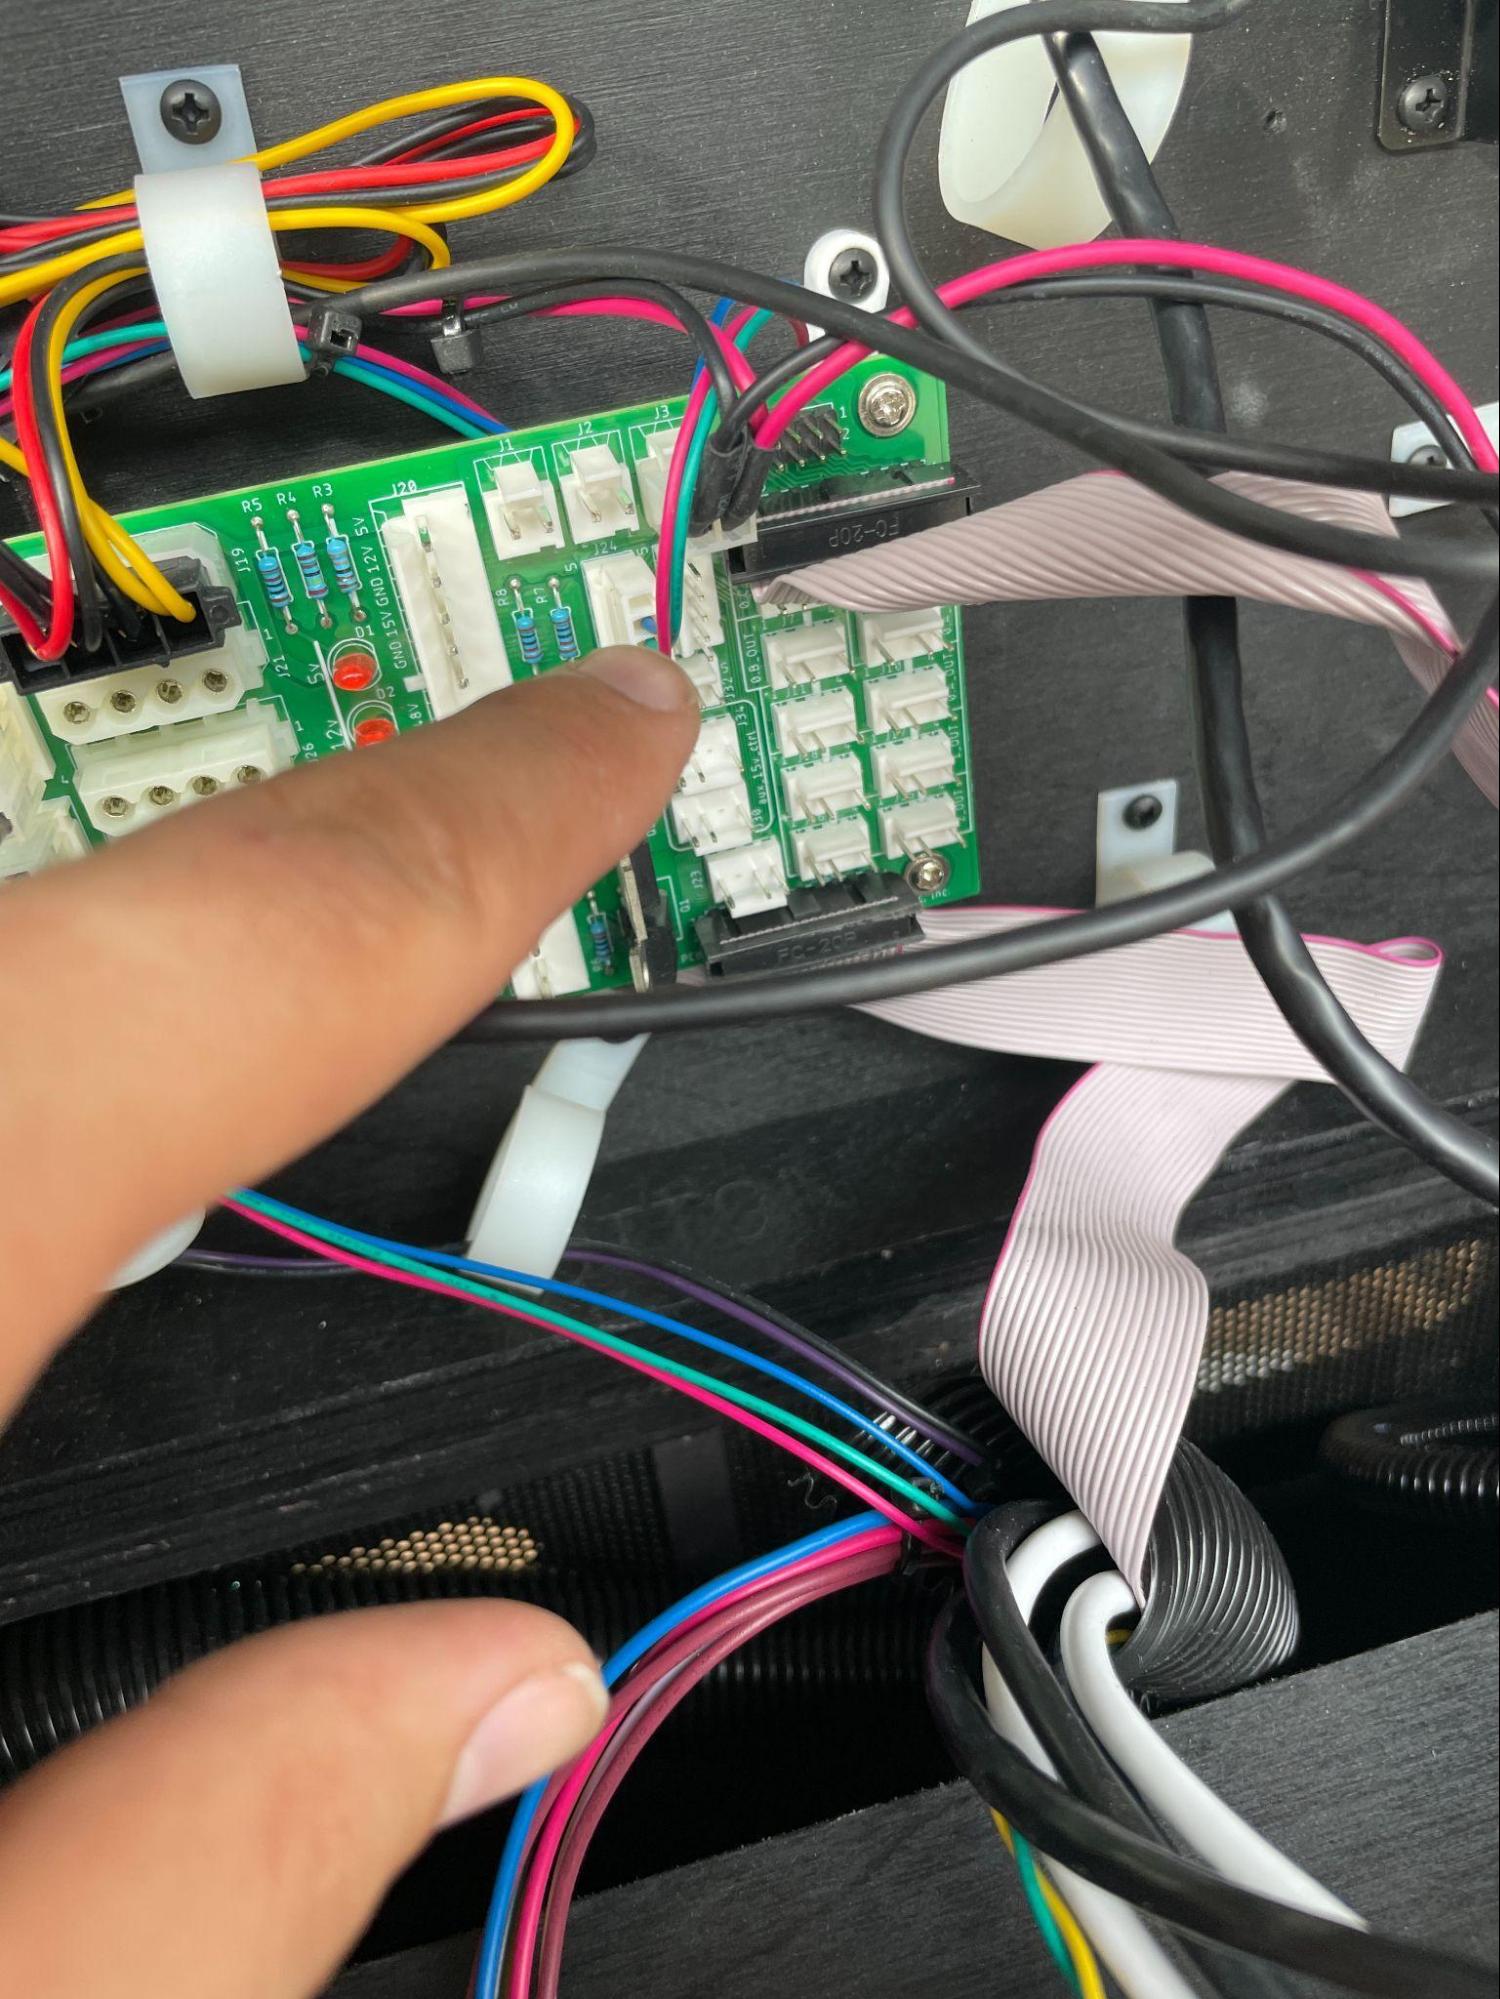
Remove the small vertical J24 connector close to the center of the breakout board.
Step 2d:
Remove the ribbon cable from the lower-right corner of the breakout board.
Step 3:
Remove the 3 USB cables and the Ethernet cable from the main motherboard. There is no need to label the USB cables because they can be reconnected to any USB port later. Make sure you press the latch clip to release the Ethernet plug.
Also remove the HDMI cable from the lower-right corner of the video card.
Step 4:
Remove the small cable in the lower-right corner of the PD-LED board.
Step 5:
Untangle all the wires coming out of the large loom. Everything should already be disconnected. Push the large loom down and out of the way.
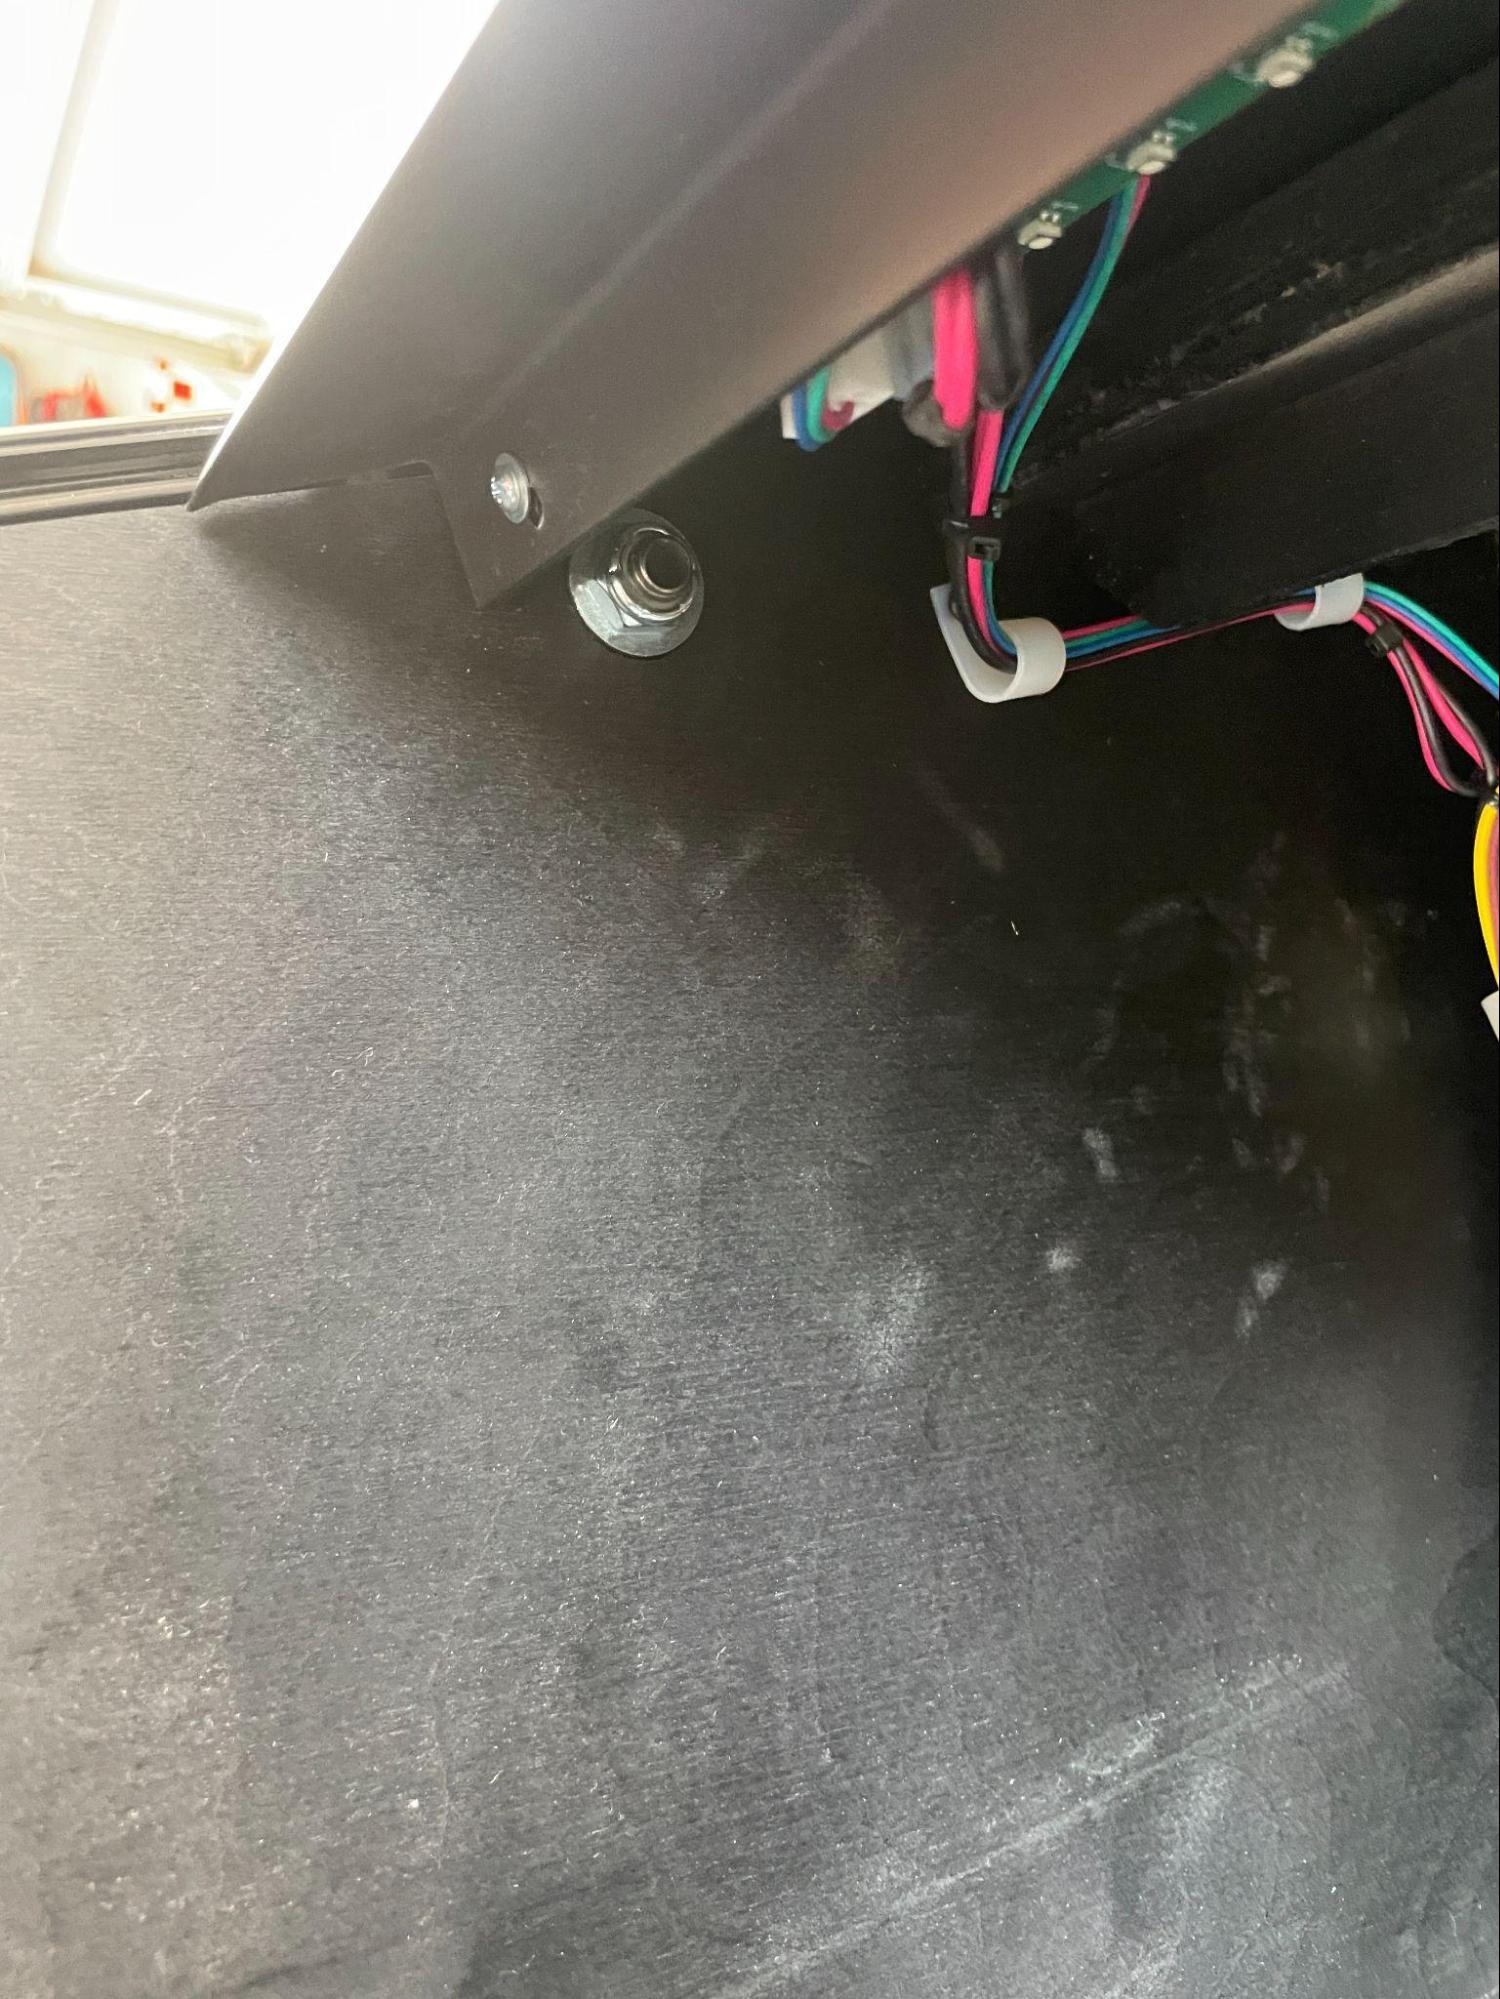
Step 6:
Remove the two bolts holding the hinge in place. There is a metal washer on the inside and a plastic washer between the hinge and the cabinet.
If present, also remove the two safety bolts going through the hinge underneath the backbox.
The head is now detached.
Appendix: How to Remove the Backbox Monitor
The backbox monitor does not need to be detached to remove the head. However, if you plan to detach both components, it is best to take out the monitor first.
If you need to remove the monitor for some reason, here are the instructions.
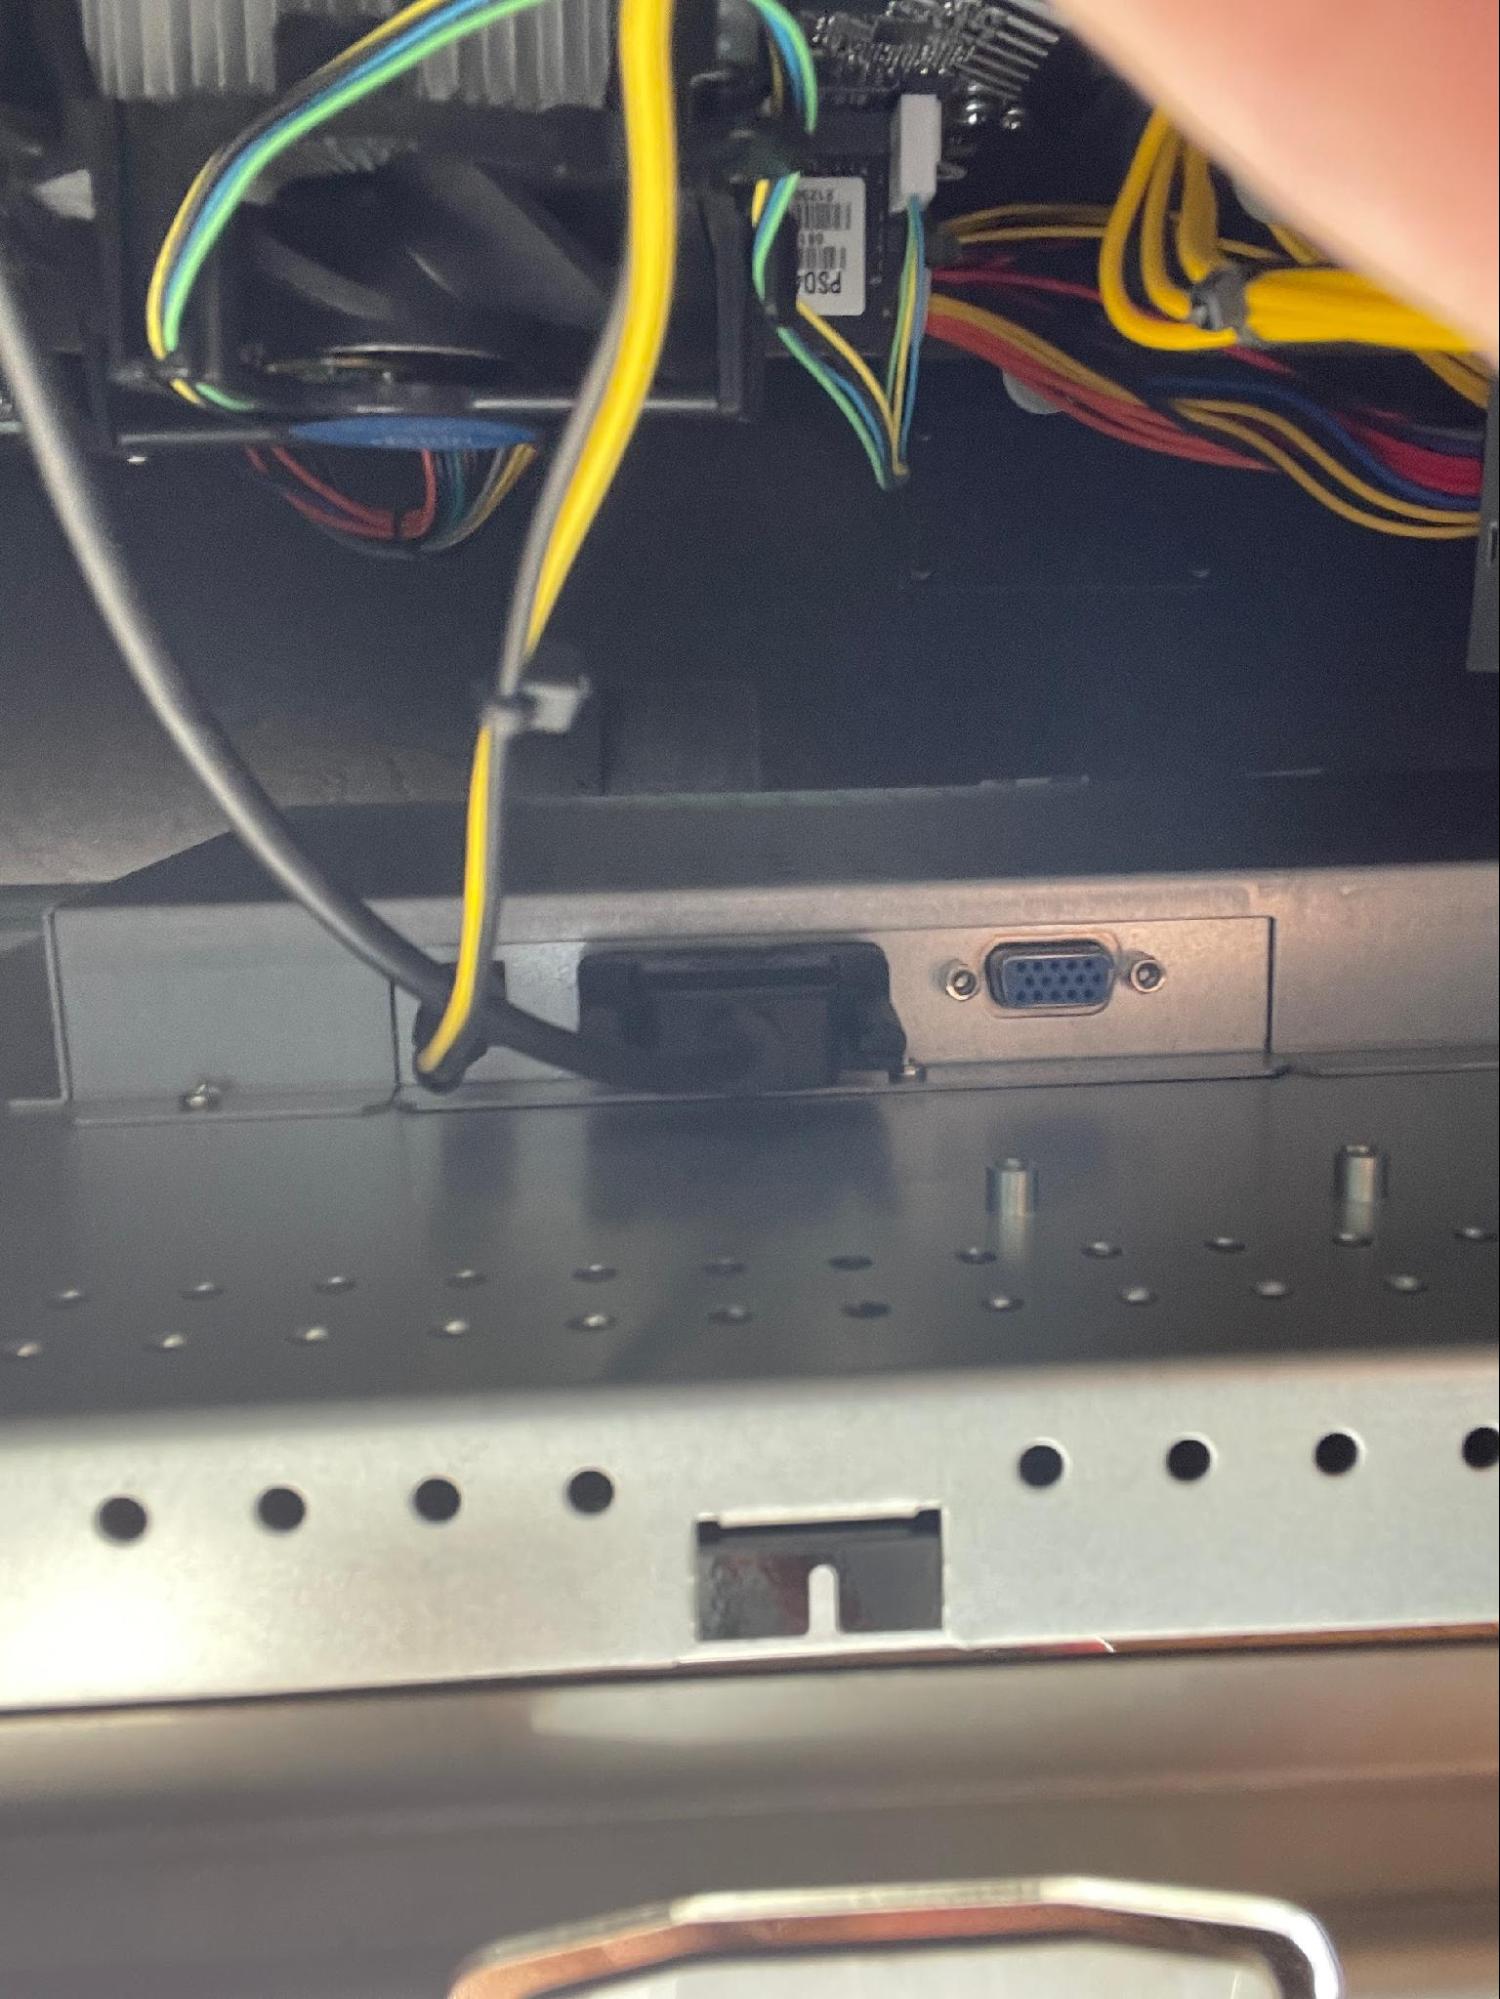
Step A1:
Disconnect the power supply cable and the DVI cable from the monitor. It may be helpful to loosen the nuts (Step A2) if you need additional clearance. Using a mirror or a smartphone camera can make this easier.
Step A2:
Remove the four 3/8" nuts securing the monitor. The monitor can now be removed and placed in a safe location.