by Guest writer Dan Howard aka BorgDog
Copyright © 2024 Dan Howard
So I've been working on this for a little while, gone through a couple prototypes and have it cleaned up and working nicely. This is not quite as easy as making new holes and mounting switches. We'll start with the finished product first then show how we got there.
The red and yellow buttons are in the same basic location, and the white is flipped to the other side, and falls in a spot that for me naturally falls under my middle and ring fingers when index finger is on the red button. This takes some getting used to, and I still mess up from time to time, but it does work very well.
I asked Multimorphic for the stock 3D files, and they were kind enough to share them with me, with the provision I don't share them without permission. I'm still not sharing their files, feel free to reach out and ask them if you want them, but I am sharing my version with their permission to do so.
I must note that I was informed that like any mods of this type that could affect the electronics, flipper performance or functionality of the machine, your warranty will likely be impacted. Quote from Gerry in that regard "That said, we'll always be eager to help people get their machines working." USE AT YOUR OWN RISK, NO WARRANTY EXPRESSED OR IMPLIED FOR THIS MOD FROM MYSELF OR MULTIMORPHIC.
Now for the fun stuff.
The main parts list and assembly instructions is mostly in the “DOCS-TECH-011A - Servicing 3-Button Button Boxes” document found on Multimorphic's wiki page (requires free login).
The instructions to remove and reinstall the button boxes are in the “DOCS-TECH-010A - How to Remove Button Boxes” document on the same wiki page.
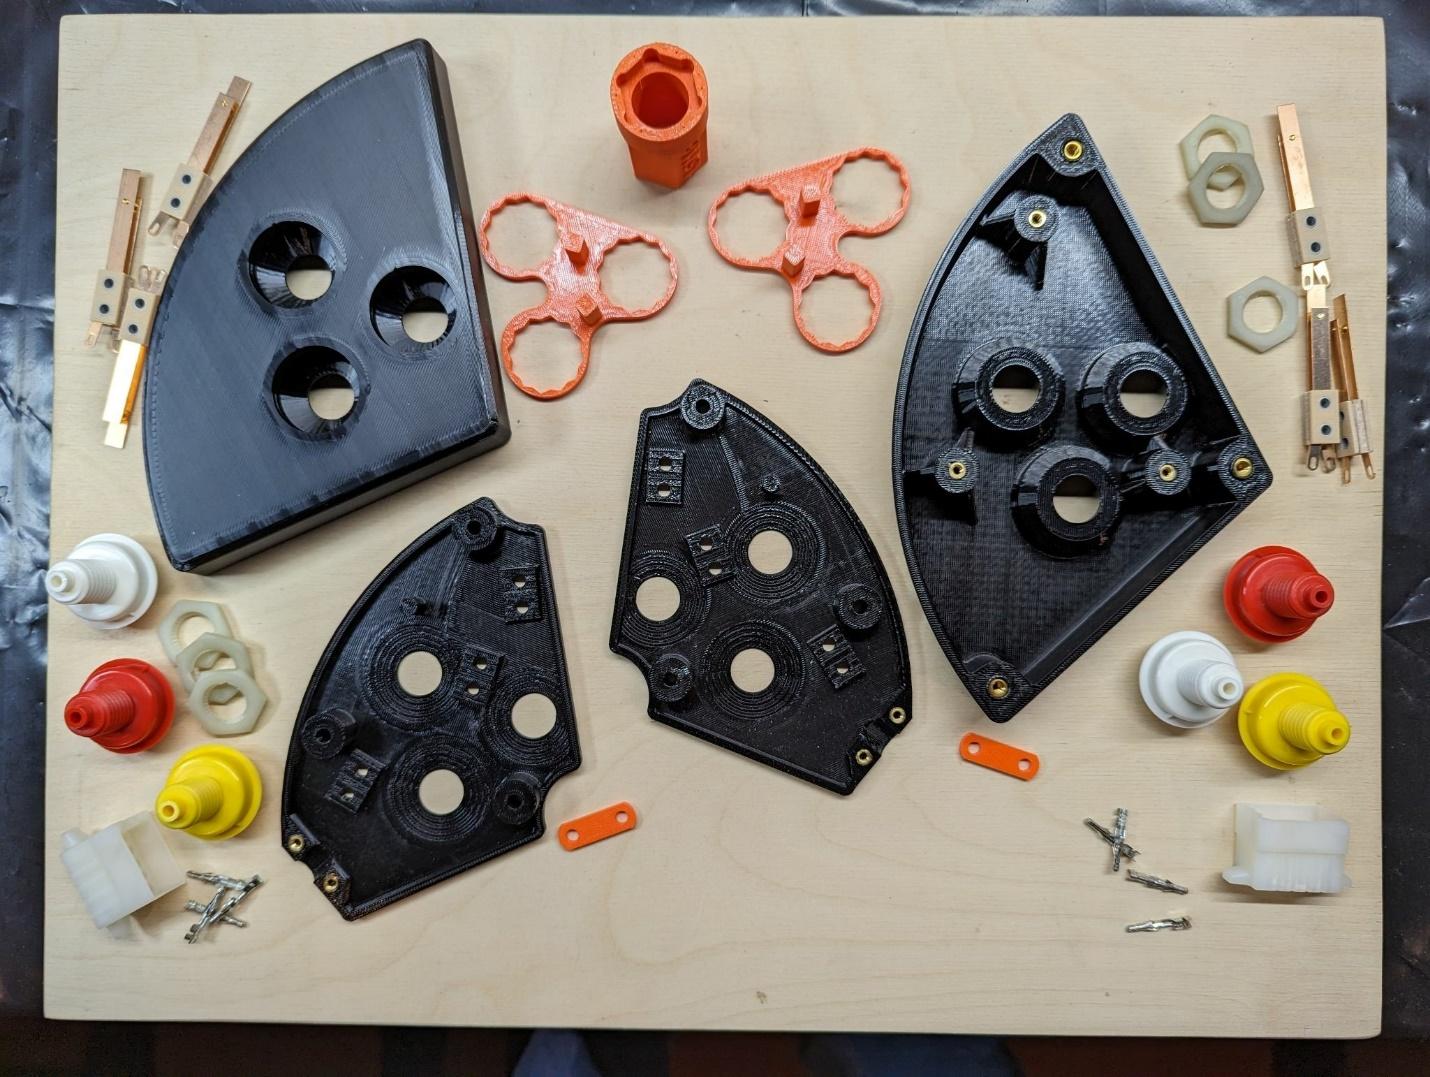
Since I wanted to keep my stock button boxes intact, I bought all new buttons, switches, screws, nuts etc needed to create these. Here is a pic of the 3D printed parts with nut inserts installed and the other pieces sans screws, nuts and wire. I printed these in PETG with 6 wall loops and 3 top shell layers (basically the 'strength' preset for my printer). I did some of my prototypes in PLA and it seemed sturdy enough, use your own judgement.
Here are the parts I bought.
From Amazon:
From Pinball Life:
From Mouser:
Of course, I did buy extras of all the above. The other parts, 6-32 screws and nuts, and black, white, red, and yellow 22ga wire I already had or sourced at my local Ace Hardware.
Alternatively, you could take the parts out of your stock boxes and install in this one. You will need to extend/change some wires to do so. You still need to buy new heat set inserts and print all the parts, except the Wire Clips and possibly the Nut Tool.
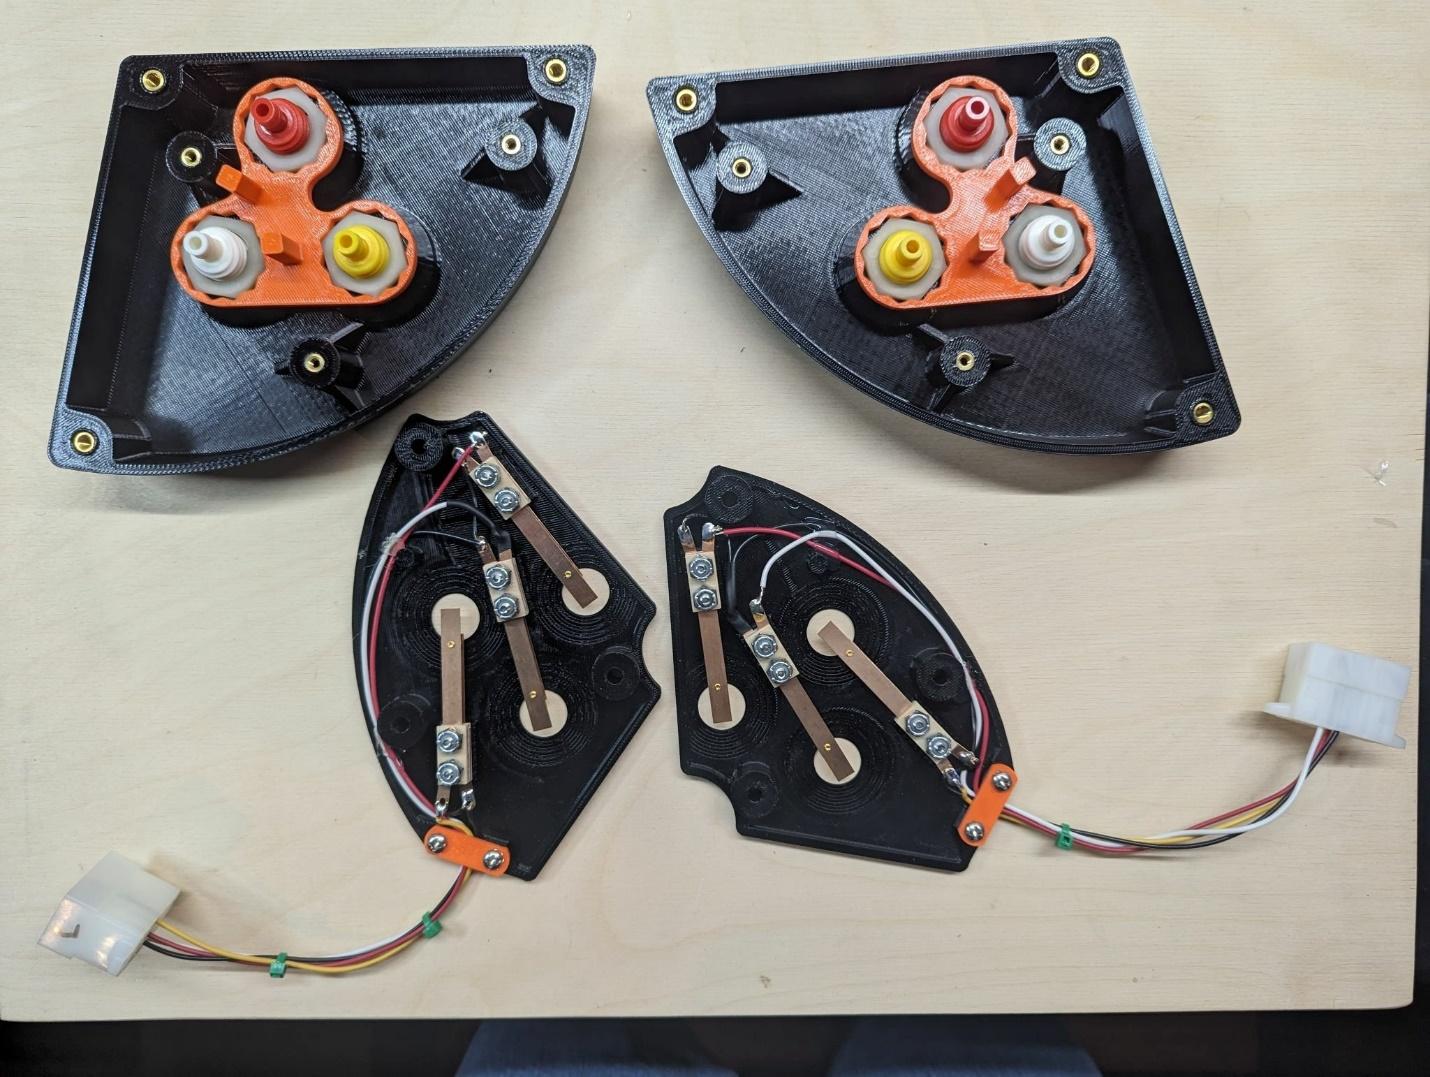
This was my first time doing heat set inserts in 3D printed parts, but it was pretty easy after watching a vid or two like this one. Using the right iron tip really helps.
Here is a pic showing everything soldered and wired, and buttons installed. Again, refer to the Multimorphic document on how this fits together, and note to check the switch spacing as described in that document after assembly. As stated in that document you will need to fiddle with the pal nuts some to get them all lined up to put the nut retainer on. The wiring is nicely color coded, red to red button, white to white, yellow to yellow, and black for common. Refer to your stock boxes for pin placement in the connectors.
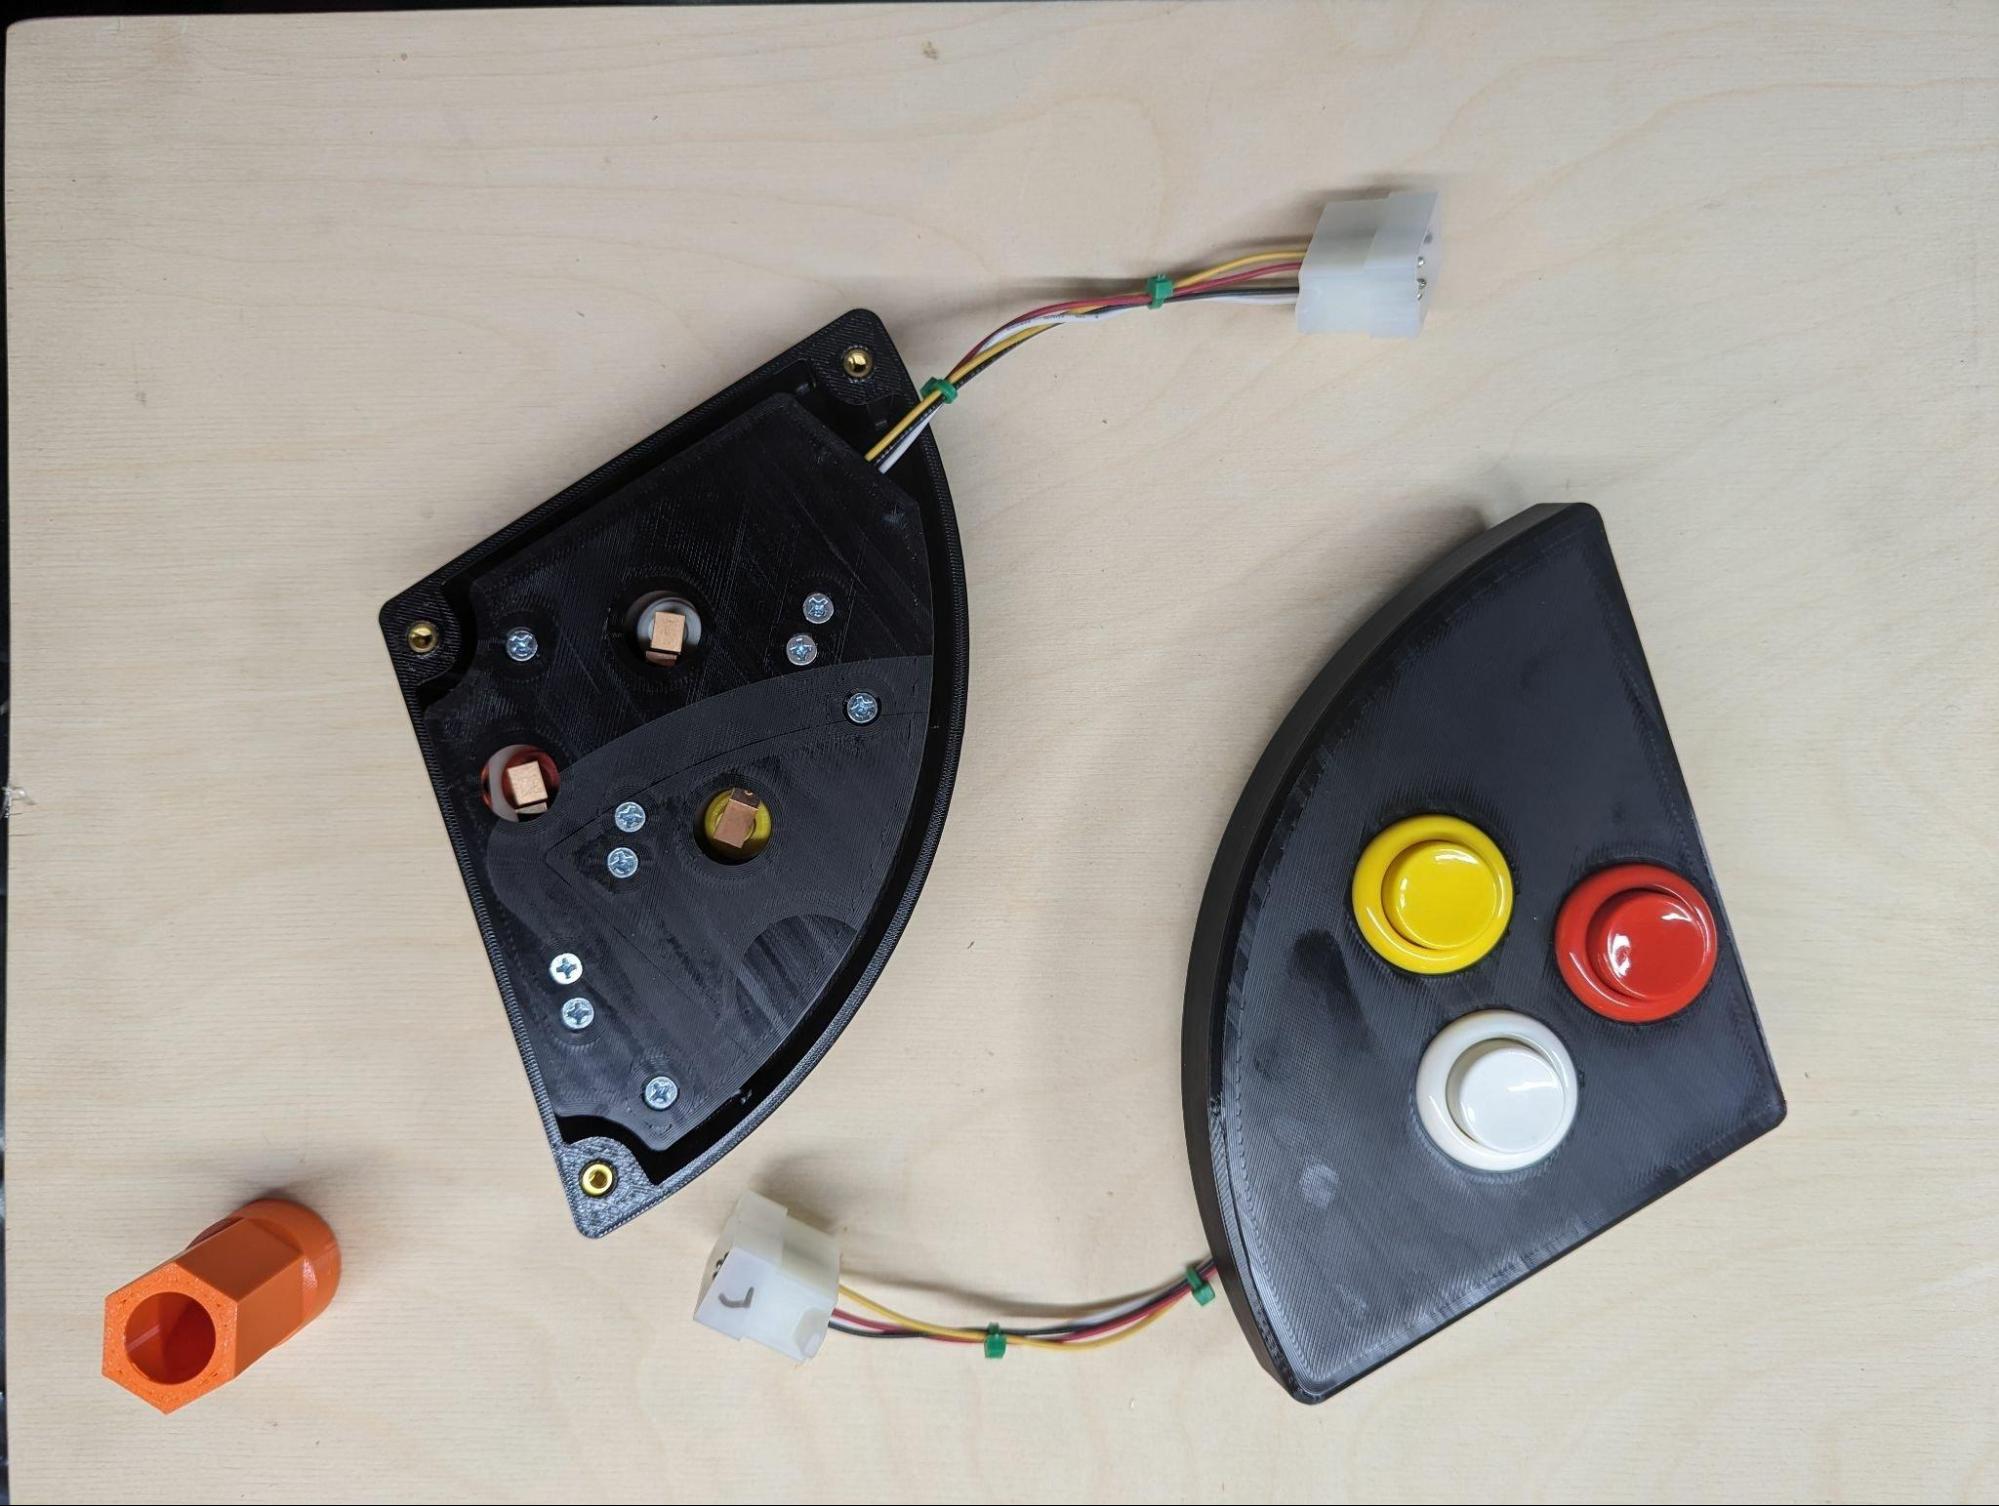
And the boxes fully assembled with the pal nut tool (STL file also included).
Installing the button boxes in the cabinet is pretty straightforward with 3 screws holding each one on, reuse the existing screws for the alt boxes. This can be done, barely, in service position one, but is much easier if you go vertical, which necessitates removing the module. Multimorphic has a nice video on how to do so on their YouTube page. Click on the image below to see the video.
You can download the zip of my STL files here.